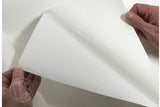
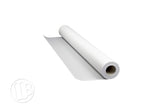
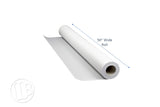
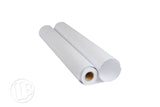
Opti-Rite® Dry Erase Wallpaper, White, Gloss, Adhesive, 48" wide
- Opti-Rite® Lite™ is a flexible dry erase covering with a peel-n-stick backing that has a semi-permanent adhesive, making it the perfect option for resurfacing existing dry erase boards
- Can be installed directly onto any non-porous painted surface to create floor to ceiling dry erase surfaces
- Carries excellent dry erase properties that resist ghosting and staining, even when writing is left on for days or weeks at a time
- Available in two roll widths, 50” and 60”
Enter a cut size (in Feet) and a quantity to add custom sizes to your order. Click the + icon to add multiple cuts. Custom cut sizes can only be cut lengthwise rounded to the nearest whole foot.
| finish | gloss |
| description | Self Adhesive Dry Erase |
| application | self adhesive |
| color | white |
| backing | self adhesive, permanent |
| roll width | 50" |
| full roll width | 150' |
| Sku | GR-OPTI-W50 |
Opti-Rite® Self-Adhesive Installation
Tools Required:
- Scissors or X-acto knife
- Level
- Pencil
- Straight edge
- Soft cloth
Included Parts:
Opti-Rite® Self-Adhesive Wallcovering
Important Tips:
- Opti-Rite should only be installed on clean, smooth, painted and non-porous walls.
- If the wall is freshly painted, allow paint to fully dry and cure. Curing times vary and can be weeks long, refer to your paint’s manufacturer for more information.
- Drywall should be painted and cured before applying this wallcovering.
- Installation of Opti-Rite ® is best accomplished by at least two people.
Installation:
Step 1: Trim your Opti-Rite® material to size. Opti-Rite® is shipped with some excess material to aid in installation. If you are applying directly to a wall, measure out the desired amount of material and trim using a straight edge. If you are applying to a framed whiteboard, you can skip step 3 and move on to Step 4.
Step 2: Mark your application measurements, if you are installing directly onto the wall. Using a level and a pencil mark where the top edge of the Opti-Rite® will be installed very lightly so that no pencil marks will show through after installation.
Step 3: Unroll Opti-Rite® Material and decide which edge will be the top. Peel the top two corners of the backing down about 12 inches leaving the rest of the backing on.
Step 4: With a partner, hold the top two unpeeled corners level and press it onto your application surface. Using a squeegee or a soft cloth, push air bubbles out of the adhesive bond by moving from center to edge.
Step 5: Pull another 12 inch section of the backing off, and lightly mist the entire unpeeled surface like in Step 4. Press this unpeeled section onto the wall and, again, use the squeegee or soft cloth to squeeze out air bubbles from the middle to the edges. Repeat this step until you’ve completed the entire length of the Opti-Rite® Material.
Step 6: If you installed directly onto a framed whiteboard, there may be extra material hanging off the edges. Use a blade to trim the material using the frame as a guide. If not, skip this step and move on to the next step.
Step 7: To prepare the Opti-Rite® material surface for use, gently wash it with a solution of 50/50% water/alcohol. Erasability will be affected if this step is not followed.


